Why the Himalayas are Different
Camping in the Western Ghats and camping in the Himalayas are related activities in the same way that swimming in a pool and swimming in the sea are related. The fundamental skills overlap, but the environment demands a different level of preparation, gear and respect.
Three things change everything above 2,500m: altitude, cold, and remoteness. Understand these three variables and your first Himalayan camping trip will be a transformation. Underestimate them and it will be, at best, miserable — at worst, dangerous.
Understanding Altitude
Altitude sickness (Acute Mountain Sickness, or AMS) can affect anyone regardless of fitness level. A professional athlete can suffer worse than a sedentary office worker. The cause is not exertion — it's the rate of ascent and individual physiology.
The most beginner-friendly Himalayan camps are in the 2,500–3,500m range — Chopta (2,700m), Kedarkantha base (3,400m), Har Ki Dun (3,566m). AMS at these altitudes is possible but uncommon if you ascend gradually and hydrate properly.
Symptoms of AMS to watch for: persistent headache, nausea, dizziness, loss of appetite, difficulty sleeping. Mild AMS resolves with rest, hydration and acclimatisation time. If symptoms worsen or you experience difficulty breathing or confusion, descend immediately — this is non-negotiable.
The golden rule: ascend slowly, descend immediately if symptomatic. No view is worth your life.
For treks above 4,000m (Hampta Pass, Roopkund, Markha Valley), carry Diamox (acetazolamide) — consult a doctor before your trip for the correct dosage. It's available at most pharmacies.
The Cold: What People Underestimate
The most common gear failure on first Himalayan trips is an inadequate sleeping bag. India's camping market is flooded with sleeping bags rated to 0°C that perform more like 10°C bags in real conditions. This matters enormously at Kedarkantha base in January, where actual temperatures drop to -10°C overnight.
The layering system is what keeps you functional in Himalayan conditions:
- Base layer: Moisture-wicking synthetic or merino wool. Never cotton — wet cotton against skin causes rapid heat loss.
- Mid layer: Fleece or down jacket. The down jacket goes on the moment you stop moving.
- Outer layer: Waterproof, windproof shell. The Forclaz MT900 is the benchmark; the NH500 is the budget minimum.
- Sleeping system: The Forclaz Trek 900 -5°C down bag covers most treks up to 4500m. Add a sleeping bag liner for extra warmth.
The extremities go first. Warm hat covering ears, fleece gloves, wool socks. Pack spares of all three.
The Best First Himalayan Camping Trips
Choose your first Himalayan camp based on access, altitude gain and season. These three are the most forgiving entry points:
Chopta Meadows, Uttarakhand (2,700m)
Accessible by road all the way to Chopta village — no trekking required to reach the campsite itself. The Tungnath day trek from camp is 4km each way and easily managed by fit beginners. Best March–May or September–November. A perfect introduction to Himalayan camping without committing to a multi-day expedition.
Kedarkantha Base, Uttarakhand (3,400m)
India's most popular winter snow trek for a reason. The trail is well-marked, guides and porters are abundant, and the 4-day itinerary gives your body time to acclimatise. The summit day is challenging but the base camp itself is accessible to anyone reasonably fit. Go December to March for snow; April to May for wildflowers.
Shivpuri, Rishikesh (340m)
Technically not high-altitude Himalayan camping — but the best introduction to Himalayan foothill camping with the least risk. Riverside, flat, excellent infrastructure, year-round access. Do Shivpuri first if you've never camped at all.
Permits — What You Need Before You Go
Himalayan trekking in India involves a web of permits that catches many first-timers off-guard. Here's the essential breakdown:
Uttarakhand: Most popular treks (Kedarkantha, Har Ki Dun, Valley of Flowers) require forest department permits available at the trailhead or from the range officer. Valley of Flowers requires an additional entry permit at Ghangaria (₹150/day for Indian nationals).
Himachal Pradesh: Hampta Pass and most Kullu-Manali region treks require no permit. Spiti Valley is open to Indian nationals without restriction; foreign nationals need a Protected Area Permit for some zones.
Ladakh: Indian nationals need an Inner Line Permit for Nubra Valley, Pangong Tso, and some border areas. Free from the DC office in Leh or online.
Sikkim and Northeast: Inner Line Permits required. Apply online 3–5 days before travel.
For guided treks, your operator handles permits. For independent trekking, verify requirements with the local forest office 2–3 days before your trek date — rules change seasonally.
Getting There: Base Towns and Transport
Most Himalayan treks originate from a handful of base towns. Understanding the transport chain saves significant time and money:
Uttarakhand treks: Fly or train to Dehradun or Haridwar. Shared jeeps run from Rishikesh to Uttarkashi (for Kedarkantha/Har Ki Dun), Rudraprayag (for Chopta), and Joshimath (for Valley of Flowers). Journey times are 6–10 hours from Dehradun to most trailheads.
Himachal treks: Volvo buses from Delhi to Manali (overnight, ~14 hours) are the standard route. Book on HRTC or Redbus. Kaza (Spiti) requires an additional 8-hour drive from Manali — only possible from June to October.
Ladakh: Fly to Leh. The road from Manali to Leh is spectacular but gruelling — 2 days minimum. Acclimatise in Leh for 2 nights before any trekking.
Water in the Himalayas
Stream water in the Himalayas looks pristine but is often contaminated by grazing animals and human settlements upstream. Always purify. Options in order of reliability:
- Boiling for 1 minute (most reliable, requires stove)
- SteriPen UV purifier (fast, effective, batteries required)
- Water purification tablets (cheap, slow — 30 minutes per litre)
- Squeeze filters like Sawyer (good for extended treks)
Carry at least 2 litres of capacity. At altitude, you need 3–4 litres per day to stay properly hydrated — significantly more than at sea level.
Pacing: The Mistake Every First-Timer Makes
The single most common mistake on a first Himalayan trek is moving too fast on day one. The excitement of being in the mountains, combined with the cool air masking exertion, leads people to push hard when they should be easing in.
The Himalayan trekking rule: go slower than you think you need to on days 1 and 2. Your body is adjusting to altitude, different food, different water and a loaded pack. Conserve energy. The mountains aren't going anywhere. The trekkers who struggle on day 3 are almost always those who rushed on day 1.
A good pace is one where you can hold a full conversation without breathlessness. If you can't, slow down.
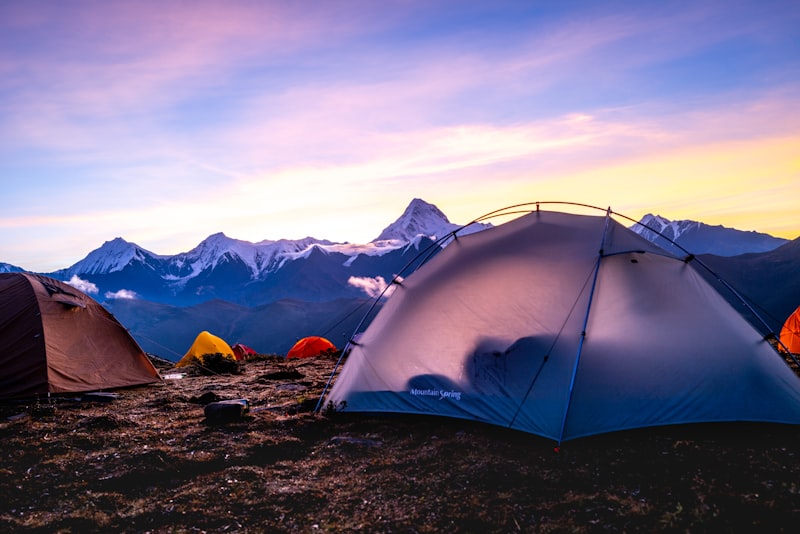
What the First Morning Feels Like
You'll sleep badly on your first Himalayan night. The altitude, the unfamiliar sounds, the cold seeping through even a good sleeping bag — it's a lot to adjust to. The headlamp glow from a neighbouring tent at 5am, the sound of a stove igniting, the smell of morning chai: these become the ritual markers of Himalayan mornings.
Then you unzip the tent door. The light at 5,500m before sunrise is a specific shade of blue that exists nowhere else. The peaks catch it first — they go pink before the valley below has woken up. If there's been a clear night, there will have been stars like you've never seen from a city or even a low-altitude hillstation.
That first morning is why people come back to the Himalayas every year for the rest of their lives. The discomfort of the night recedes immediately. The tent gets packed, the boots go on, and the day begins.
Prepare well. Go slow. Respect the altitude. The mountains will give you everything else.